Google Chrome is one of the most popular web browsers available today. What sets it apart from other browsers is its focus on performance and optimization rather than a wide range of built-in features. While this has significantly improved browsing speed, users often encounter challenges when using Chrome. Fortunately, there are several handy tricks to make the most out of the browser.
Taking Screenshots Using Developer Tools
When you come across interesting content while browsing, you might want to take a screenshot. Usually, this requires third-party software or browser extensions. However, if you don’t have these tools installed, can you still capture a screenshot? Yes, you can—using Google Chrome’s built-in Developer Tools.
To begin, open Google Chrome or its derivatives like Chromium, and navigate to the desired webpage. Click on the three dots in the top-right corner, then select “More Tools†> “Developer Tools.†In the Developer Tools window, click the “Toggle Device Toolbar†button to adjust the preview window size. You can also use the “Responsive†mode to simulate different mobile devices such as iPhones, iPads, or Samsung models.
If you're satisfied with the preview, click the “...†button in the top-right corner of the preview window and choose “Capture Screenshot.†The image will be saved automatically in your browser’s default download folder (see Figure 1).
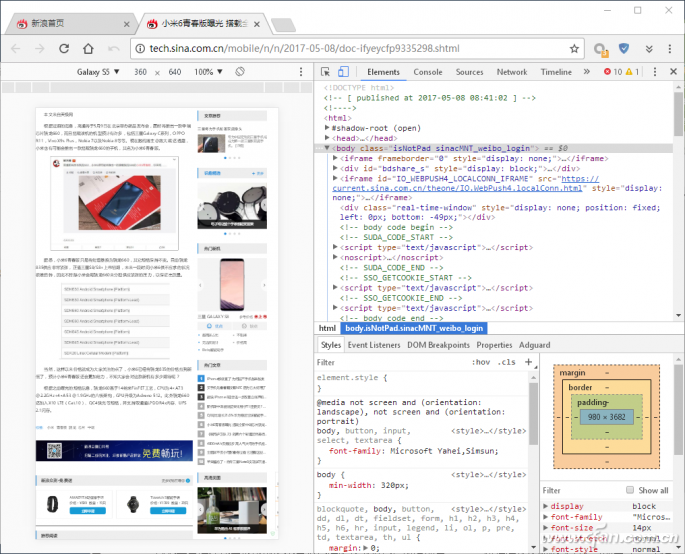
Tip: If you want to include a device frame in your screenshot, simply click the “...†button and select “Device Frame†before capturing the screen.
Adjusting Screenshot Size
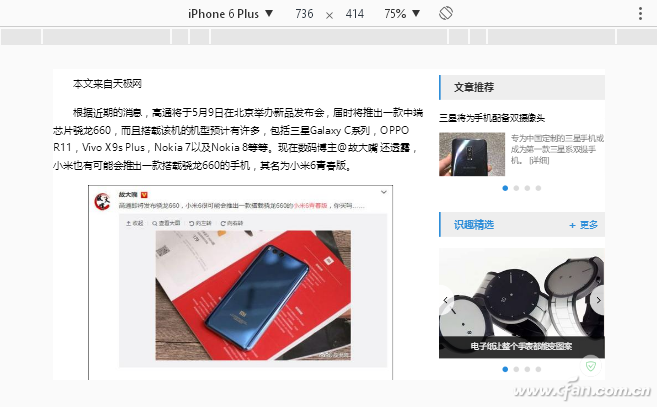
If you only need a part of the page, the above method works well. But if you want to capture the entire webpage, you may need to adjust the window size manually. Start by clicking the “Responsive†button in the toolbar. Then, enter the desired width and height to fit the entire page. You can also adjust the zoom level or rotate the view for better visibility (see Figure 2).
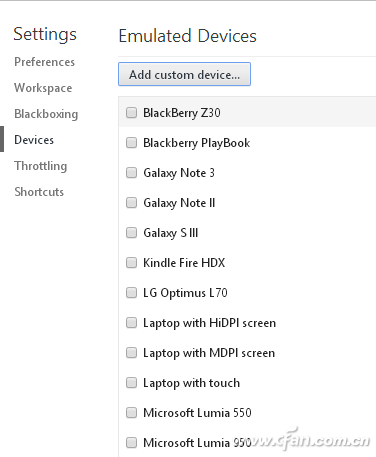
Additionally, if you frequently take screenshots, you can customize your own device sizes. Go to the “Responsive†menu, click “Edit,†and add a custom device by setting a name, width, and height. Choose between desktop or mobile mode, and save your settings. This way, you can quickly access your preferred resolution later (see Figure 3 and 4).
Customizing Search Engines
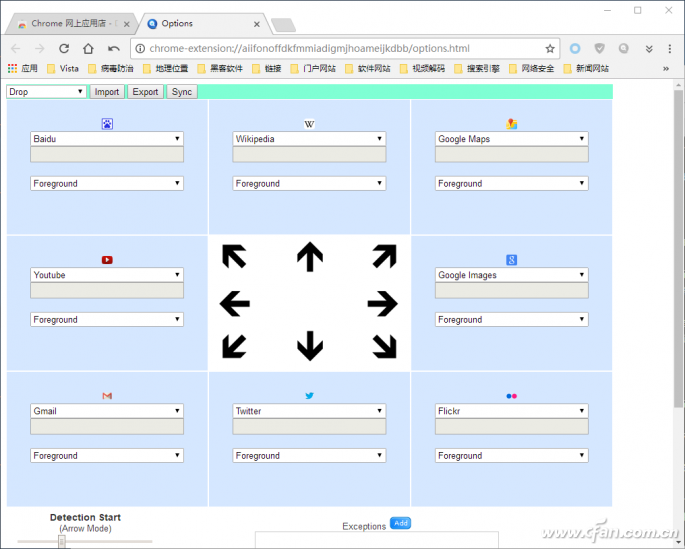
Although Chrome has a search bar, it currently allows only one default search engine at a time. Switching between engines can be inconvenient. However, you can simplify this process by installing an extension called “Drag & Drop Search.â€
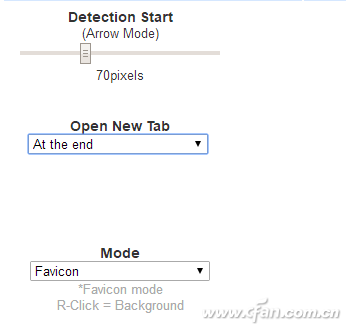
First, visit the Chrome Web Store and install the extension. After installation, click the extension icon in the toolbar and select “Options.†From here, you can change the default search engine to something like Baidu, Bing, or Yahoo. You can also set how search results open—either in a new tab or in the foreground. Once configured, just select any keyword, and a pop-up menu will appear with your preferred search engines (see Figure 5).
REMOTE CONTROL SOCKET
Important Safeguards
When using any electrical appliance, in order to reduce the risk of fire, electric shock and/or injury to persons, basic safety precautions should always be follow8d. including:
• The appliance is for household and indoor use only.
• Before plugging in. check that the voitage on the rating label is the same as the mains supply.
• To protect against electric shock, do not immerse any part of the product in water or other liquid.
• This socket is intended for use by competent adults only and children should be supervised at all times.
• Do not use the socket for other than its intended use.
• This socket can be used by children aged from 8 years arxl above and persons with reduced physical, sensory or mental capabilities or lack of experience and knowledge if they have been given supervision or instruction concerning use of the appliance in a safe way and understand the hazards involved. Children shall not p<ay with the appliance Cleaning and user maintenance shall M be made by children without supervision.
• Children of less than 3 years should be kept away unless continuously supervised.
Children from 3 years and less than 8 years shall only switch on/off the appliance provided that it has been placed or installed in its intended normal operating position and they have been supervision or instruction concerning use of the appliance in a safe way and understand the hazards involved. Children aged from 3 years and less than 8 years shall not plug in. regulate and clean the appliance or perform user maintenance.
• Don't use this socket in the immediate surroundings of a bath, a shower or a swimming pool.
• In case of malfunction, do not try to repair the socket yourself, it may result in a fire hazard or electric shock
Do Not Exceed Maximum a680W
Place the LR44 batteries provided into the compartment in the back of the Remote Control, please insert as sho*/m in the back of the compartment to ensure the polarity is correct.
Programming Instructions
• Plug the Remoce Socket$($)lnto the wall socket(s) and switch on the mams supply, the red LED will flash every second.
• If the LED is not flashing press & hold the manual ON/OFF button for 5 seconds until it Hashes
•Press any ON switch on the Remote Control for approximately 2 seconds and the Remote Socket(s) learn the code. The LED will stop flashing top confirm the codehas been accepted.
• Any number of Remote Sockets can be programmed to one Remote Control ON button to create multiple switching.
• To programme o<her Remote Sockets on different Remote Control ON buttons repeat the prevous steps
• If the mains supply is turned off the Remote Sockets v/ill lose their code and it wil be necessary to re-pcogramme.
Operation:
• Plug your appliance(s) into the Remote Socket(s)
• Press the programmed ON or OFF button on the Remote Control to control the Remote Socket.
♦ The Remote Sockets can also be operated manually using its ON/OFF Button Trouble shooting
If a Remote Socket does not react to the Remote Control please check the followng:
♦ Low battery in tbo Remote Control
• Distance too large between the remote control and the recerver (ensure the range distance is no more than 20 clear Metres) and free from obstacle that may reduce the distance.
• If programming has not been successful, tum the power off and back on then follow the programming steps above.
How to decode
• Press the manual ONX)FF button for 5 seconds until the red LED flashes once per
second to confirm de-coding is successful
♦ Press the ALL OFF switch on the Remote Control for more than 3 seconds, the LED
flashes once per second to confirm (decoding successful.
Voltage: 240V-/50HZ
Max power rating: 3680W max.
Remote frequency:
Remote range:
Battery Type:
433.92MHz
230 Metres
Button Cell 2x1.5V LR44 =
Please check with your local waste management service authority regarding regulations for the safe disposal of the batteries. The batteries should never be placed G municipal waste.
Use a battery d^posal facility if available
M
For eioctncal products sold within the European Community. At the end of the electrical products useful life, it should not be disposed of wth household waste. Please recycle faaMies exist. Check with your Local Authonty or retailer for recycling advice.
C€
remote switch,remote plug,remote control switch,remote power switch,remote control sockets
NINGBO COWELL ELECTRONICS & TECHNOLOGY CO., LTD , https://www.cowellsocket.com