A foreign DIY fan, terrible tinkerer, likes to write and draw before going to bed. In order not to disturb the sleeping wife, I decided to use DIY for 1W lighting for night use. Wrigley's cans, outdated electronic components and other items are the best choice for his secondary use. So what are the specific steps? Please see the decomposition below:
Step 1: Collecting components
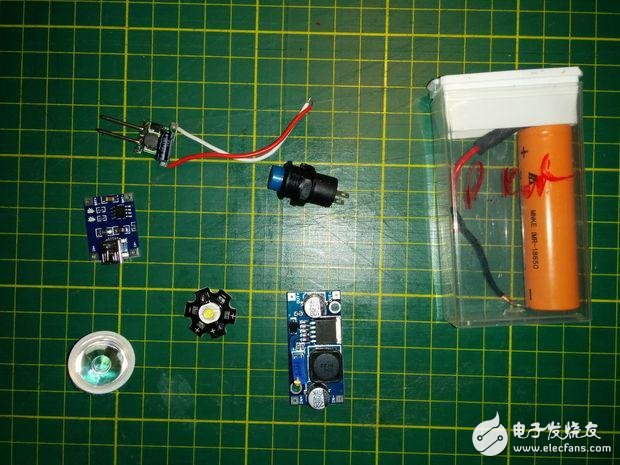
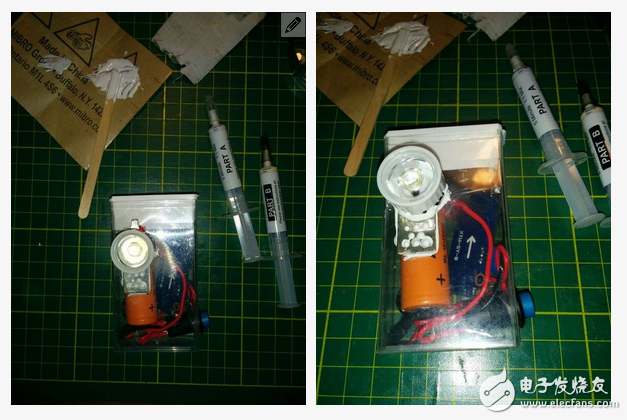
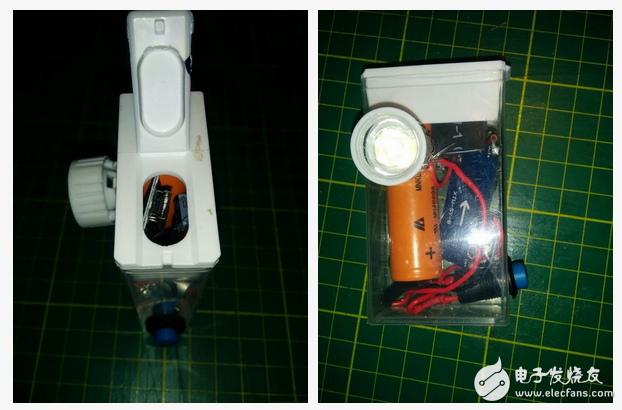
To complete the work, terrible tinkerer chose a 3.7V 18650 rechargeable battery that was unloaded from an old laptop, a box that holds a large 18650 battery, and a solar panel that collects light energy.
Device list:
A large enough plastic box (shown above, can hold the battery)
3.7V 18650 rechargeable battery
1W high power cold white LED
1-3W 30 degree clear optical lens
MR16 type LED lamp with current of 320-350mA
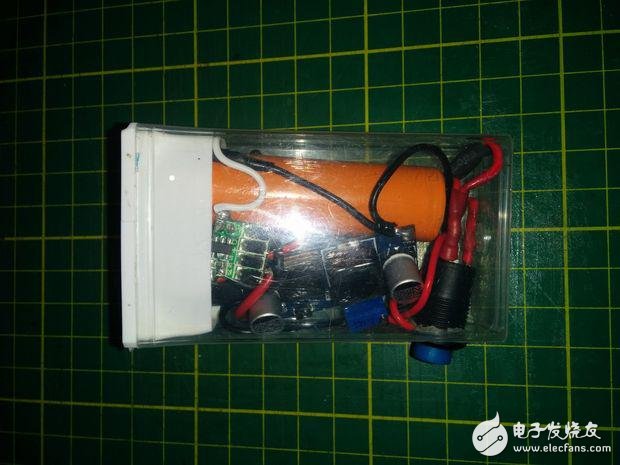
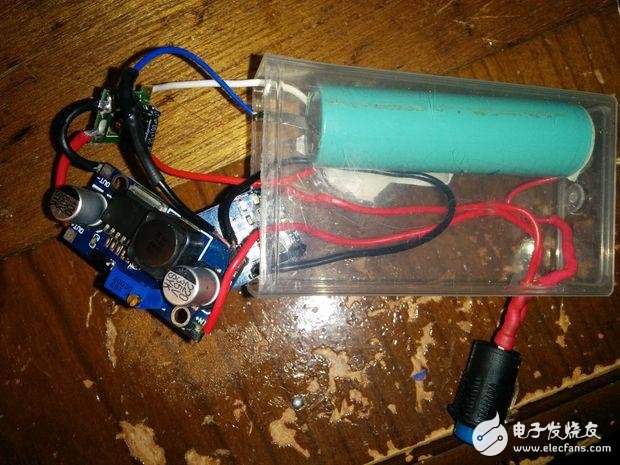
Step-up DC Power Converter Chip XL6009
DC-DC regulated boost power converter model TP4056
5V micro USB 1A lithium ion battery charging board power charger module
On/off switch
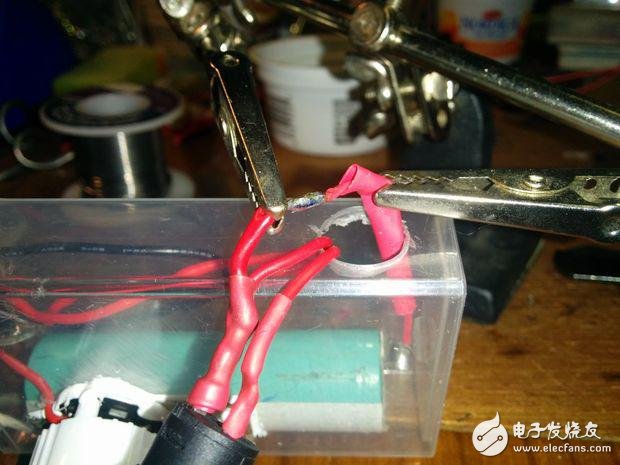
Wire gauge is 22AWG red and black wire
As for the cost, it depends on the materials used. In the plastic box bought by Giant Tiger, it only costs $2.49, and the 3.7V battery that is unloaded from the old laptop can buy 1W LED step-down lamp from eBay, optical lens 5 about one dollar, MR16 about one dollar, TP4056 - 10 $3.33, also requires an on/off switch and some lines. These costs less than $10, but if you need to buy every device, the phone bill is more than $10.
Step 2: Start
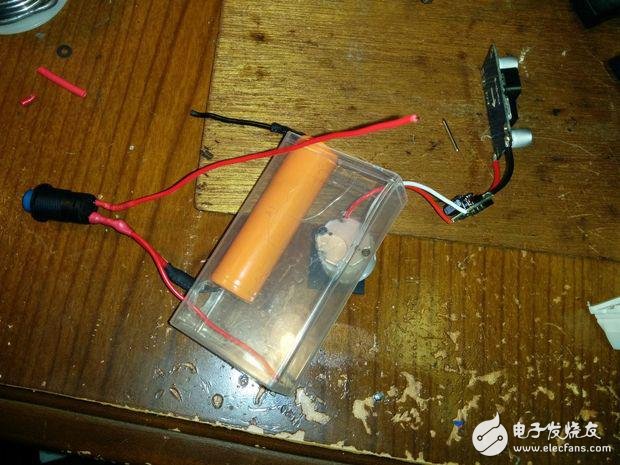
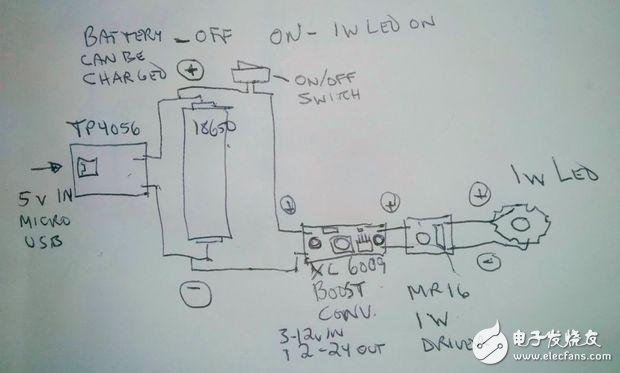
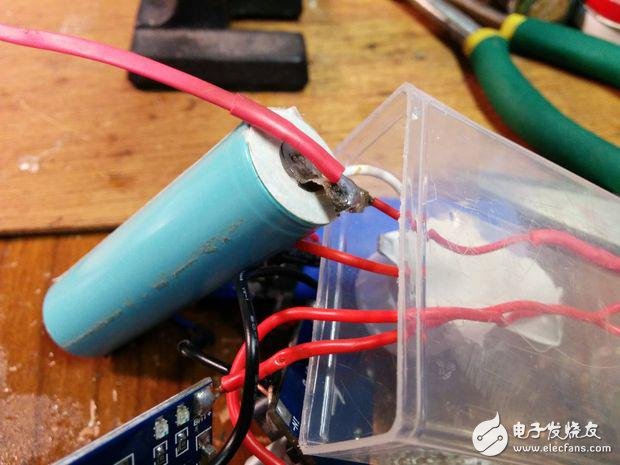
In this project, terrible tinkerer abandoned the need to use the battery holder to reduce the need to remove the battery every time. Using the tp4056 solar charging module, it can be soldered to the circuit to be able to connect to the solar panel USB. The car power point USB or 5V other USB is used for charging. The 18650 battery is charged with red and black wires soldered to the positive and negative terminals of the battery. This is what the terrible tinkerer knows in the laptop battery. Just use it.
Step 3: Next Steps Overview—To start a 1W incandescent lamp, the terrible tinkerer uses a mr16 driver to deliver a constant current of 350mA. Mr16 needs to be driven by 12V, so he chose a boost converter XL6009 (which can convert a 3-12V input to a 12-24V output) to boost the 18650's 3.7V to the required 12V. Recently a tp4056 module can be connected directly to the battery for charging with a Micro Usb Cable. The author of the whole process is based on the above circuit diagram. If readers feel that this idea is not suitable for you, you can also do it in a way that you feel is simpler.
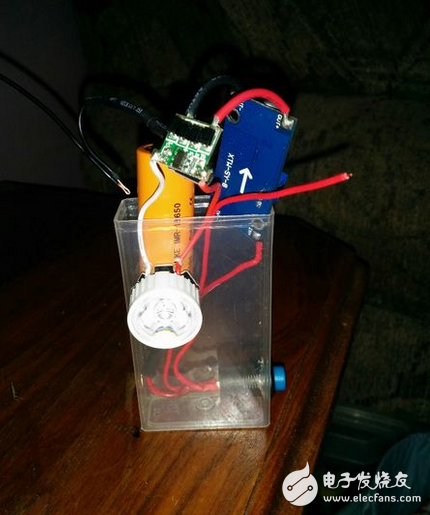
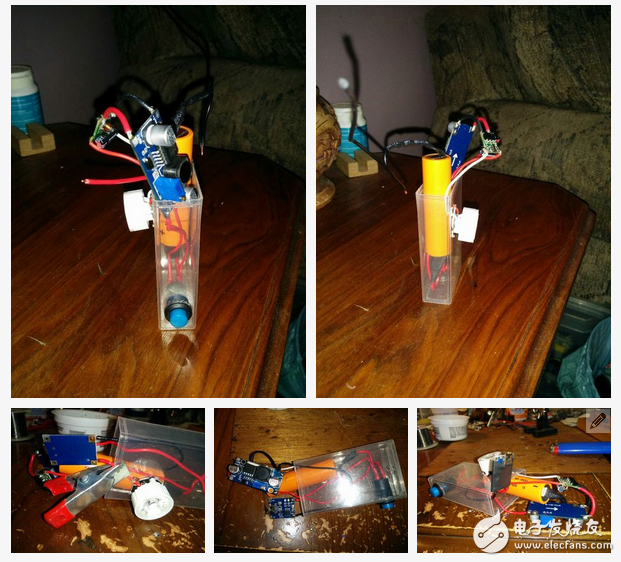
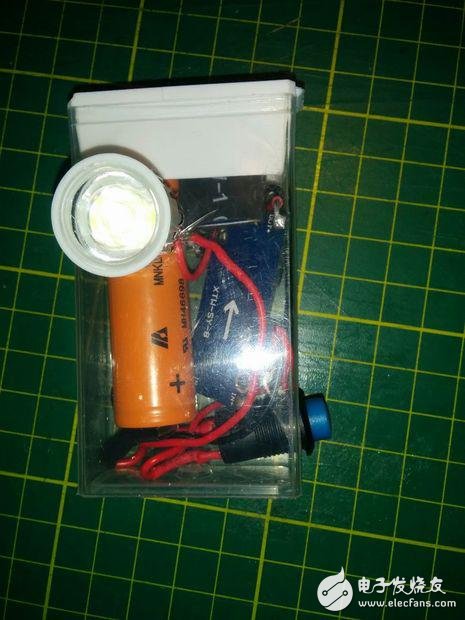
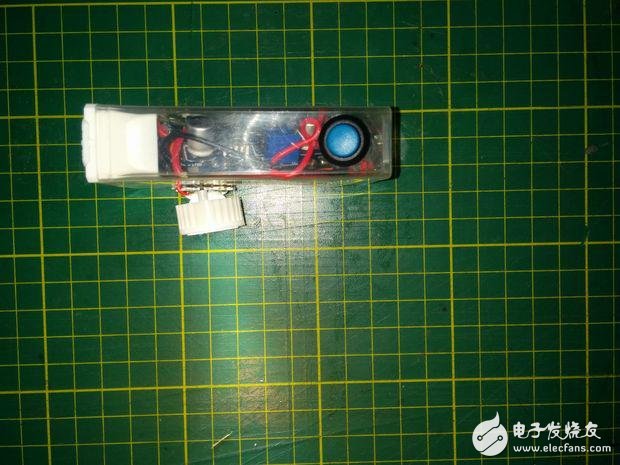
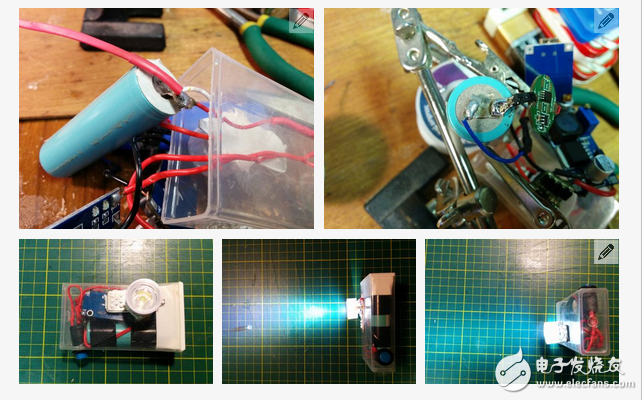
Weld three red wires on each side of the on/off switch and drill a hole in the box to install the switch. Install the aluminum radiator on the side of the light. Make two markers where the box is crossing the line. Drill some small holes and then glue the LED aluminum heat sink to the container. This will gradually dissipate the heat generated by the LED light in the plastic box. Later, it was found that the method of fixing the LED heat sink in the plastic box with hot glue would not work. It took a full 10 minutes to dissipate the heat in the box.
Step 4: Thermal adhesive
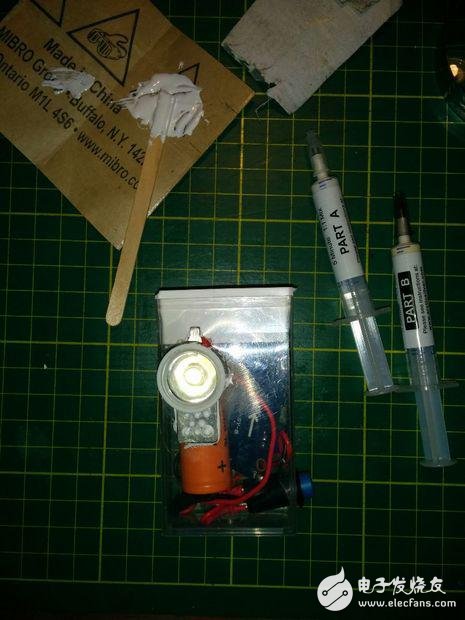
Before terrible tinkerer had barely touched this very special way of pasting, and I don't know if it can stick aluminum to plastic, but he thinks it can be tried. It is called Arctic Alumina. It's easy to use and it's easy to stick your fingers.
Step 5: Is this the case?
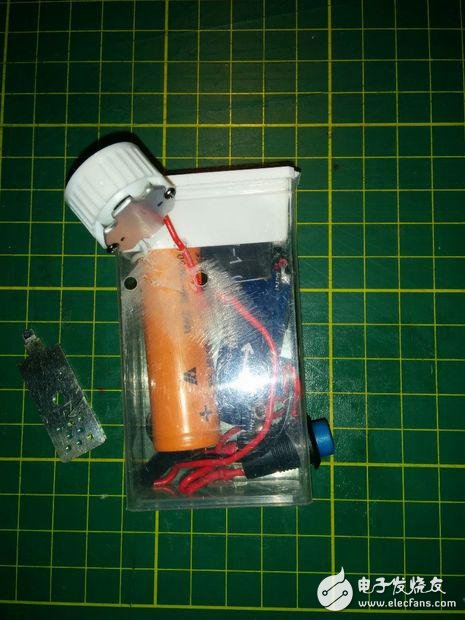
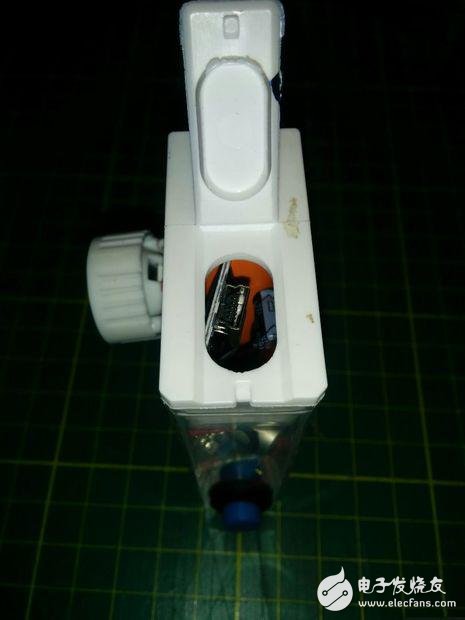
Since the tp4056 is placed on the top, it is easy to access the USB Cable through the lid of the dispenser.
Imagine that the electronic components are properly and orderly covered with containers. Not full! The optical lens is shaken by the seat until the heat is glued into place. Here you can change the angle of the lens, so terrible tinkerer did not stick it to the ground.
The 1W LED throws soft light, maybe a bit too bright, but that's what the author needs. And its outdoor lighting intensity is also amazing.
Seeing this, terrible tinkerer said: "I am not an electronic expert but a dreamer. I like to make things. It is purely a pursuit of satisfaction! This project is very interesting. I also like to make these finished products by myself. I will make some mistakes, but it is also part of my enjoyment."
Step 6: Practical value

The orange 18650 had no electricity after one night of use. But terrible tinkerer tells that this is because it has been used both outside and inside for a long time, and it is also clear about the light intensity it produces. The Tp4056 model only protects it from overcharging above 4.2V. It does not prohibit the battery from being drained.
A blue 18650 additional wire was found, the orange was cut and the blue wire was welded, and the device worked again.
Terrible tinkerer is very interested in this project and hopes that it will be successful. I hope that the 18650 device will run smoothly when driving the lights.
Step 7: Circuit Protection
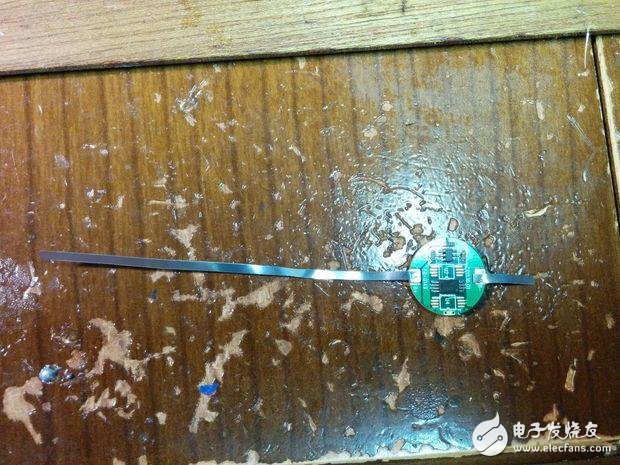
After exchanging the battery, the terrible tinkerer monitored the voltage level throughout the day, and almost never missed the voltage data of 18650 at any time of the day, so he decided to try the light intensity again at night, but it is not currently possible. Because of the circuit protection problem, a circuit is placed here, it may be a safer choice to solder it, and they are still a whole in the box after soldering. A similar device, sold at $ 1.20 in Fasttech, operates at 3.6 - 4.2V, has a discharge cutoff voltage of 2.4V, and has a charge cutoff of 4.25V, which prevents battery drain. At the same time, terrible tinkerer ordered a charging protection module that has four LEDs that indicate the battery's charge level when a button is pressed.
This article is selected from the "Automotive Electronics Special", more quality content, download now 
Usb 2.0 Cable,Usb Wire,Usb Line,Usb Cable Extension
CHANGZHOU LESEN ELECTRONICS TECHNOLOGY CO.,LTD , https://www.china-lesencable.com