Guide
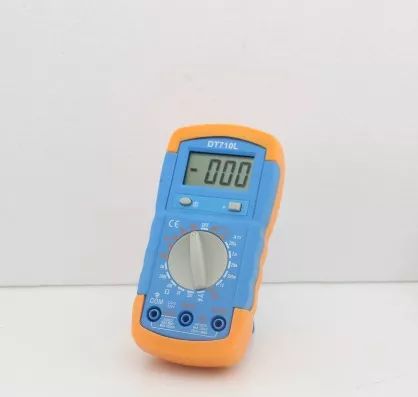
Digital multimeters are widely used in various industries and often experience malfunctions. In this article, we’ve compiled some common repair methods and techniques to help you troubleshoot and fix your digital multimeter efficiently.
Before diving into repairs, it’s essential to identify the general direction of the fault. Remember this simple rule: start from the outside and move inward, tackle easy issues first, then focus on more complex ones. This approach helps streamline the diagnostic process and saves time.
Here are some effective repair methods and techniques:
Sensory Inspection
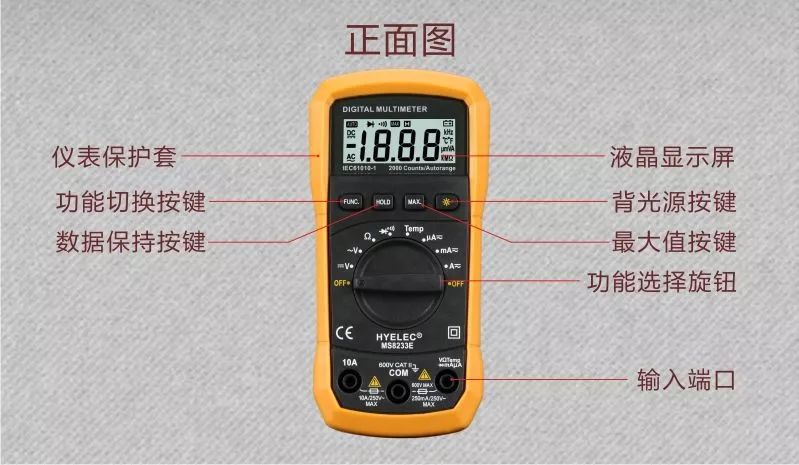
Use your senses to detect potential problems. A visual inspection can reveal obvious issues like broken components, loose connections, or burnt areas. You can also check for unusual heat from resistors, transistors, or ICs. Gently touch parts to feel if they’re overheating, and listen for strange sounds or smells that may indicate a problem. This method is especially useful for identifying physical damage or component failure.
Of course, always prioritize safety, especially when dealing with high-voltage circuits. Never work on live equipment without proper precautions.
Voltage and Short Circuit Testing
Check the voltage at key points in the circuit to identify where the issue might be. For example, measuring the operating voltage or reference voltage of the A/D converter can help locate the problem quickly. The short-circuit method is commonly used in A/D converter testing, especially when repairing low-voltage or micro-electronic devices.
Open Circuit Method
Disconnect suspected sections of the circuit from the main unit. If the fault disappears, the problem lies in the disconnected part. This method is ideal for diagnosing short-circuited circuits and isolating faulty components.
Component Measurement
Once the fault is narrowed down to specific components, measure them either online or offline. If necessary, replace the suspected component with a known good one. If the issue is resolved, the original component was likely defective.
Interference Method
Use body-induced voltage as an interference signal to observe changes in the LCD display. This technique is helpful for checking whether the input circuit and display section are functioning properly.
Repair Techniques
1. If all functions are not working, check the power supply and A/D converter circuits first.
2. If there's an open circuit, inspect the power switch and battery leads carefully.
3. In case of a short circuit, use the open circuit method to isolate the faulty components. Focus on checking operational amplifiers, timers, and the A/D converter. These components are often involved in such issues. It’s important to check the A/D converter along with the basic meter head, similar to the DC head in analog multimeters. Here’s how to do it:
- Set the meter to the lowest DC voltage range.
- Check the working voltage of the A/D converter by comparing the measured value with its typical value.
- Measure the reference voltage (usually 100mV or 1V) between VREF+ and COM. Adjust if necessary using an external potentiometer.
- Short the IN+ and IN- terminals of the A/D converter to set the input voltage to zero. The display should show “00.0†or “00.00.â€
- Test the full display stroke by shorting the TEST pin to V+. All segments should light up, and the display should read “1888†or “18888.†If any segment is missing, check the corresponding output pin and connections between the display and the IC.
4. If only certain functions are malfunctioning, ensure the A/D converter and power supply are working correctly. Shared components like voltage dividers, shunts, and AC/DC converters can cause issues if faulty. Always refer to the schematic to trace the problem accurately.
5. If the readings are unstable or increasing cumulatively, check the 0.1μF reference capacitor. Poor performance here can lead to measurement errors.
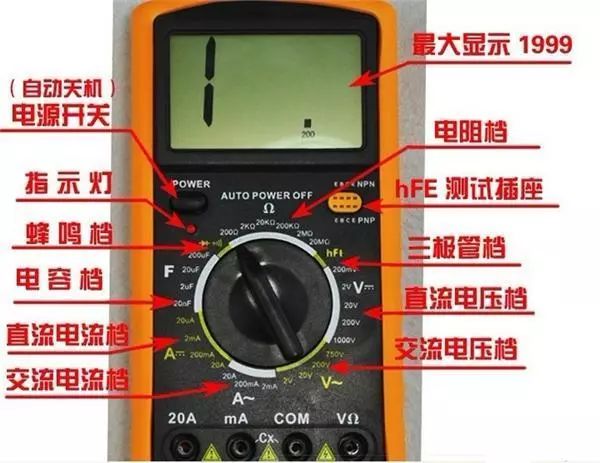
The general repair sequence for a digital multimeter should follow: meter head → DC voltage → DC current → AC voltage → AC current → resistance → Cx → HFE, F, etc. However, don’t hesitate to address visible issues first to speed up the process.
In summary, a faulty multimeter requires careful diagnosis before repair. Start by analyzing possible fault areas, then locate the exact issue using the circuit diagram. Since digital multimeters are complex instruments, it’s crucial to replace components with matching specifications. Especially when replacing the A/D converter, ensure it’s selected by the manufacturer to maintain accuracy.
Many manufacturers produce digital multimeters in China, but quality varies. When repairing, pay attention to the copper board quality and insulation strength of the PCB. Poor insulation can cause measurement errors, especially under high voltage. During repairs, distinguish between the resistance values of voltage dividing resistors to avoid mistakes. Using the open circuit method can help pinpoint the fault location effectively.
Burnt or carbonized areas should be cleaned thoroughly to meet insulation requirements. If the double-sided connection is broken due to a broken via, it may resemble a faulty switch. In such cases, short-circuit testing can help identify the actual fault point.
This article covers essential repair methods and techniques for digital multimeters. We hope it proves helpful in your troubleshooting and repair efforts. With patience and the right approach, most issues can be resolved efficiently.
DOOH LED Display Screen,Customized Outdoor LED digital signage,Energy saving DOOH Message Display,High brightness DOOH LED commercial billboard,Customized DOOH LED screen,Digital Out-of-Home LED screen
Shenzhen Xinfei Century Technology Co., Ltd. , https://www.rgbdancing.com